MELODY SAUCE HELP GUIDES
User Guide
Once you’ve completed the set-up and have combined Melody Sauce with a software instrument, you are ready to begin creating melodies.
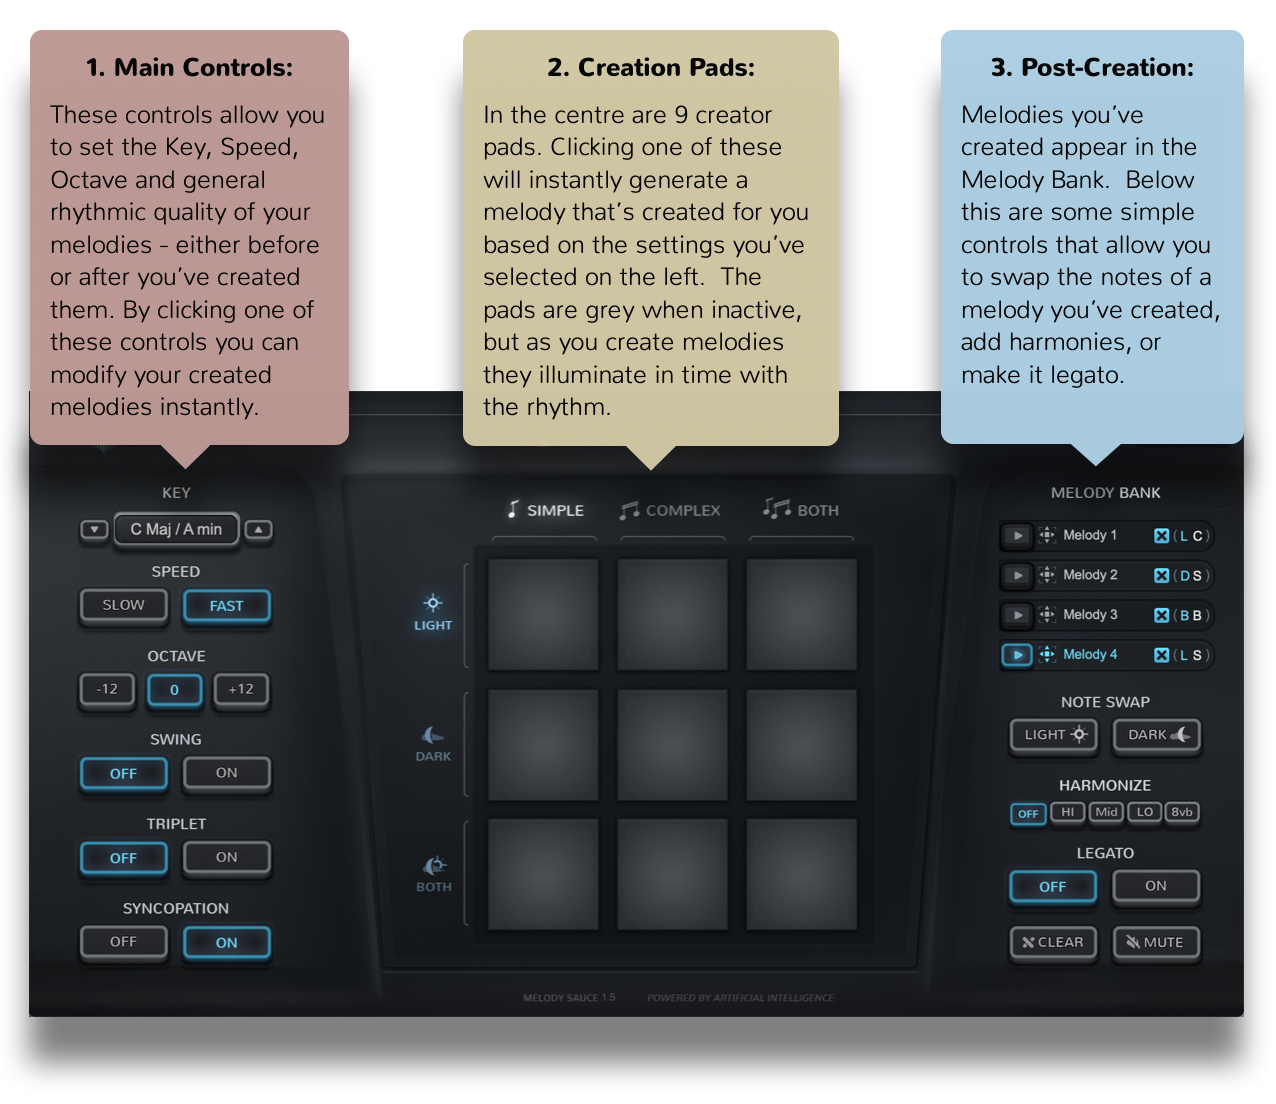
Since finding the right melody is often about trying different ideas out over other song elements, Melody Sauce’s simple interface is designed to allow you to experiment with the various settings and easily create and audition different types of melody whilst playing your project. The interface is divided into 3 areas:
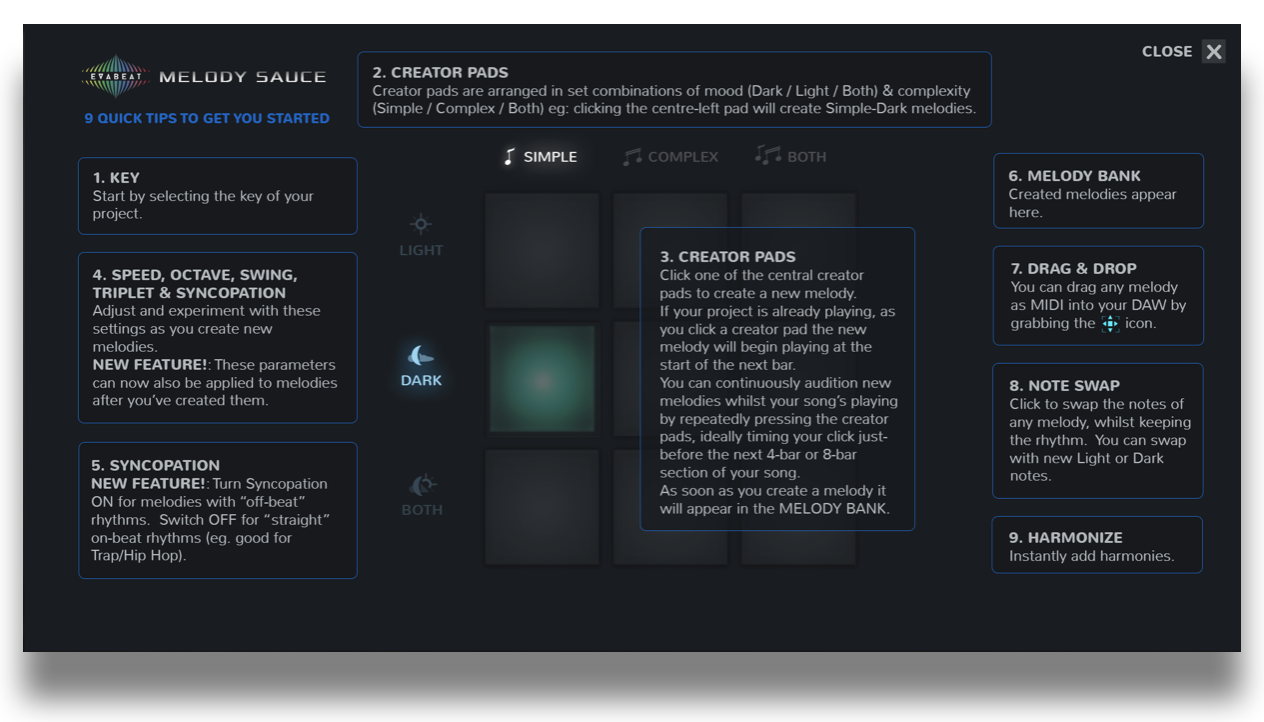
QUICK HELP TIPS:
Click on the help tips icon in the top right corner to display the quick tips window to get help get you started:
1. MAIN CONTROLS
Changing these settings will have an instant effect on all Melody Sauce’s output - you can select them before you create a melody, or you can select them after to instantly modify the melodies you’ve already created.
As creating melodies with Melody Sauce is so simple, you can easily experiment with the above settings until you find the right melody.
1.1 KEY

Select a key from the Key dropdown menu - this should be the key of the project you’re working on. The keys are organised in major and relative minor pairs (eg: C Major / A Minor). If you’re having trouble finding which key you’re in, you can use the up/down arrow buttons to shift up or down in semitone increments until your melody sounds in key.
1.2 SPEED

Select whether Melody Sauce will create faster or slower melodies. This will partly depend on the overall tempo of your track. As a rough starter guide, use “Slow”for tempos around 140 bpm and above, “Fast” for tempos around 80 bpm or slower, and either for anything in between.
1.3 TRANSPOSE

Set the output to create an octave higher or lower.
1.4 SWING

Select to add swing when you create melodies. This tends to work best with with the “Fast” speed setting.
1.5 TRIPLET

Select Triplet to restrict Melody Sauce to creating melodies with triplet rhythms. This tends to work best with with the “Fast” speed setting.
1.6 SYNCOPATION
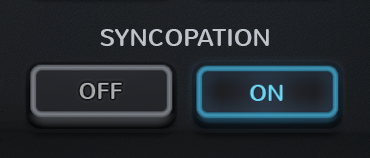
The Syncopation button allows you to control whether or not your melody has syncopated rhythms (“offbeat” or “skipped” rhythms). When ON, the melody will almost always contain some syncopated rhythms. When OFF, the melody will have un-syncopated “straight”rhythms.
2. CREATION CONTROLS
2.1 CREATOR PADS

Clicking one of the 9 central creator pads will instantly create a melody that’s created for you there and then, based on the parameters you’ve selected on the left hand side of the interface. The pads are initially grey when active, but once you click one they will illuminate in time with the created melodies.
Along with the pre-creation settings on the left hand side of the interface, Melody Sauce also creates melodies based on mood and complexity options. To make it easy to experiment with these “on the fly” as you play your project, the pads are set out in pre-arranged mood and complexity combinations, so that you can easily select a different combination by simply clicking a different pad.
Sync/Timing
As Melody Sauce automatically syncs to your DAW’s internal clock and timeline, to get the created melodies to play in the correct sequence it works best if you place your song’s elements in standard positions that are 4-bar blocks from the start position 1.1.1 (eg. at the start of bars 1, 5, 9, 13, 17 etc). Melody Sauce will continue to loop-play the melody from this point.
2.1.1 Mood & Complexity

The complexity option titles runs horizontally along the top of the creator pads display, and the mood option titles run vertically down the side of the pads. Complexity options are “Simple”, “Complex” or “Both”. Mood options are “Light”, “Dark”, or “Both”. For example, to create melodies that are light and complex, the corresponding creator pad for this combination would be the pad in the middle of the upper row.
Once you click one of the creator pads, Melody Sauce instantly creates a 4-bar or 8-bar MIDI melody (depending on the speed you’ve selected), and if your project is already playing Melody Sauce will automatically plays this at the start of the next bar, and the pads will illuminate in time with this melody. The melody will also appear as a MIDI clip in the Melody Bank on the right of the interface (see 3.1 below).
You can continuously audition new melodies whilst your song plays by repeatedly pressing creator pads, ideally timing your click somewhere before the next 4-bar or 8-bar section in your song. And you could even create clips in a live performance setting.
3. POST-CREATION CONTROLS
3.1 MELODY BANK

When Melody Sauce creates a melody it automatically stores this as a MIDI clip in the Melody Bank.

Play button: you can go back to any previously created melody and play it by clicking the melody’s play button.
Melody Sauce will continue to add the melodies you create here, and you can scroll up and down to view the ones that aren’t currently displayed. The settings used in the clips are shown in the 2-letter code at the end of the clips e.g.

shows that the “Dark” and “Complex” was used.

Delete button - press to delete any clips individually.

Drag & Drop: the created MIDI melody clips can be dragged out of the Melody Bank and directly into your DAW simply by grabbing them by their drag-and-drop icon to the right of a melody’s play button .
This action automatically mutes Melody Sauce’s output (see 3.5 below) so you can continue to work in your DAW. When you’ve finished working in your DAW and want to return to creating more melodies in Melody Sauce simply un-click the mute button.
NB: FL STUDIO - FL Studio allows you to drop MIDI directly into the Channel Rack or into an instrument’s Piano Roll. Alternatively you can drag the melody clips to your desktop and import them.
3.2 SWAP:

Clicking one of the Swap buttons allows you to instantly swap the current melody with some new notes whilst keeping the same rhythm. This is useful when you’ve found a rhythm you like, or when you want to create multiple versions of a melody to create some melodic development or counter melodies. The left hand Swap button will swap the current notes with new “light” notes, and the right hand Swap button will swap the current notes with new “dark” ones.
3.3 HARMONIZE:
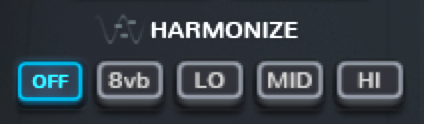
Clicking one of the Harmonize buttons allows you to instantly add simple 2-part harmonies to the melodies you’ve created. The “8vb” button doubles the current melody an octave below, and “Lo”, “Mid” and “Hi” add various different harmonies. Clicking “off” will remove the harmonies.
Harmonies can only be added after clips have been created, and they won’t work if the polyphony of the underlying instrument is set to mono/monophonic.
3.4 LEGATO
Click the Legato button ON to make the melody legato.
3.5 CLEAR / MUTE

Clicking the clear button will clear all the created melodies stored in the Melody Bank - so only do this if you’re happy to erase them as there is no undo function for this.
Clicking the mute button will mute Melody Sauce’s output. Mute is automatically activated when you drag a MIDI clip out of Melody Sauce and into your DAW. Un-clicking the mute button will re-engage Melody Sauce’s output.
SUPPORT
For any support questions please visit https://evabeat.com/support/.
Melody Sauce FAQs
If you have any pre-sales questions about Melody Sauce before you buy, or need post-sales help installing or using Melody Sauce, please take a look at our extensive FAQs. Below are some of our most asked FAQs.
Yes, students can get 25% off and music education faculties can buy a 10 seat license at 50% off. More details here.
As you have already activated your Melody Sauce 2 upgrade you don't need to complete the full upgrade process on each subsequent computer you want to use.
After upgrading, your Melody Sauce 2 upgrade serial (license key) is used like a full serial. Simply copy and paste your Melody Sauce 2 serial (license key) in the first serial screen you come to - it should only have space for 1 serial (license key).
If you get an invalid serial error, please follow the steps in the FAQ: Full version of Melody Sauce 2: I get a serial not valid error.
Make sure to follow the first 3 steps below. If you still have an invalid serial error, then move on to the subsequent steps.
1. Make sure you enter your full Melody Sauce 2 serial (license key)l in the correct serial screen in the Melody Sauce 2 plugin - it is the first screen you come to when opening the plugin for the first time.
2. Copy and paste to enter your serial (license key).
- For Mac 1. Use Command-C to copy serial number 2. Click your cursor inside the serial box first 3. Then use Command-V to paste serial (license key)
- For Windows 1. Use Control-C to copy serial number 2. Click your cursor inside the serial box first 3. Then use Control-V to paste serial (license key)
Note: Make sure there are no spaces at the start when you paste. Pay attention to the serial format xxxx-xxxx-xxxx-xxxx-xxxx. If any of the 5 sections of characters is only 3 characters long then you have accidentally added a space at the start.
3. Make sure you have a stable internet connection during the activation process.
4. Delete the "license_file" and "serial_file" files from the following location:
For OS X: /Users/<username>/Library/Keyzy/
For Windows: HKEY_CURRENT_USER\\Software\\Keyzy\\
Here is some info on how to access the Registry Files in Windows.
When you go to the "Software" folder in the registry, you should be able to see a "Keyzy" sub-folder, and in there are the 2 files to delete.
Once you have deleted the files, load the plugin and copy and paste your serial (license key) again.
5. If you have accessed your registry and there is no license-file or no Keyzy folder at all, this confirms that you have a firewall setting that is preventing Melody Sauce 2 from writing the necessary files to your computer. Turn any firewalls off during the activation process and also note that some VPNs can cause issues too.
For Windows users, here is some info on how to configure Windows Defender to allow programs like Melody Sauce 2 to be installed properly.
Make sure to follow the first 3 steps below. If you still have an invalid serial error, then move on to the subsequent steps.
1. Make sure you enter your Melody Sauce 2 Upgrade serial in the correct serial (license) screen in the Melody Sauce 2 plugin. To get to this screen, press the upgrade button on the first screen you come to when opening Melody Sauce 2. You should see space for 2 serials (license keys) to be added.
2. Make sure you copy and paste your original Melody Sauce version 1 serial (license key) in the first white section.
- For Mac 1. Use Command-C to copy serial (license key) number 2. Click your cursor inside the serial box first 3. Then use Command-V to paste serial (license key)
- For Windows 1. Use Control-C to copy serial (license key) number 2. Click your cursor inside the serial box first 3. Then use Control-V to paste serial (license key)
Note: Make sure there are no spaces at the start when you paste. Pay attention to the serial (license key) format xxxx-xxxx-xxxx-xxxx-xxxx. If any of the 5 sections of characters is only 3 characters long then you have accidentally added a space at the start.
4. Once you successfully paste your original Melody Sauce version 1 serial (license key) the second space for a serial (license key) becomes available. Copy and paste your Melody Sauce 2 upgrade serial (license key) in the space and click the blue upgrade button.
If the activation isn't successful, please make sure you followed the first 4 steps accurately and then move on to the next steps below.
5. Make sure you have a stable internet connection during the activation process.
6. Delete the "license_file" and "serial_file" files from the following location:
For OS X: /Users/<username>/Library/Keyzy/
For Windows: HKEY_CURRENT_USER\\Software\\Keyzy\\
Here is some info on how to access the Registry Files in Windows.
When you go to the "Software" folder in the registry, you should be able to see a "Keyzy" sub-folder, and in there are the 2 files to delete.
Once you have deleted the files, load the plugin and go through the upgrade process again.
7. If you have accessed your registry and there is no license-file or no Keyzy folder at all, this confirms that you have a firewall setting that is preventing Melody Sauce 2 from writing the necessary files to your computer. Turn any firewalls off during the activation process and also note that some VPNs can cause issues too.
For Windows users, here is some info on how to configure Windows Defender to allow programs like Melody Sauce 2 to be installed properly.
The serial (license key) is sent to you by email from Sealbucket. You may need to check your junk folder.
If you haven't received your serial please open a support ticket and we'll send you it.
You can also view your serial in your Evabeat account if you have purchased from our site.
You can find this in the email you received from Sealbucket (older customers might have received their email from Keyzy.io) when you first purchased Melody Sauce 1, or by logging into your account page.
If you can't write inside the serial (license key) space, use copy and paste to add your serial (license key). We recommend this anyway, as it is the best way to avoid inputting errors.
- For Mac 1. Use Command-C to copy serial number 2. Click your cursor inside the serial (license key) box first 3. Then use Command-V to paste serial (license key)
- For Windows 1. Use Control-C to copy serial number 2. Click your cursor inside the serial (license key) box first 3. Then use Control-V to paste serial (license key)
Note: Make sure there are no spaces at the start when you paste. Pay attention to the serial (license key) format xxxx-xxxx-xxxx-xxxx-xxxx. If any of the 5 sections of characters is only 3 characters long then you have accidentally added a space at the start.
You can view our release notes here https://www.evabeat.com/release-notes which will be updated shortly after each release of Melody Sauce 2.
You can view our release notes here https://www.evabeat.com/release-notes which will be updated shortly after each release of Melody Sauce 2.
Yes, students can get 25% off and music education faculties can buy a 10 seat license at 50% off. More details here.
If you can't write inside the serial (license key) space, use copy and paste to add your serial (license key). We recommend this anyway, as it is the best way to avoid inputting errors.
- For Mac 1. Use Command-C to copy serial number 2. Click your cursor inside the serial (license key) box first 3. Then use Command-V to paste serial (license key)
- For Windows 1. Use Control-C to copy serial number 2. Click your cursor inside the serial (license key) box first 3. Then use Control-V to paste serial (license key)
Note: Make sure there are no spaces at the start when you paste. Pay attention to the serial (license key) format xxxx-xxxx-xxxx-xxxx-xxxx. If any of the 5 sections of characters is only 3 characters long then you have accidentally added a space at the start.
As you have already activated your Melody Sauce 2 upgrade you don't need to complete the full upgrade process on each subsequent computer you want to use.
After upgrading, your Melody Sauce 2 upgrade serial (license key) is used like a full serial. Simply copy and paste your Melody Sauce 2 serial (license key) in the first serial screen you come to - it should only have space for 1 serial (license key).
If you get an invalid serial error, please follow the steps in the FAQ: Full version of Melody Sauce 2: I get a serial not valid error.
Make sure to follow the first 3 steps below. If you still have an invalid serial error, then move on to the subsequent steps.
1. Make sure you enter your Melody Sauce 2 Upgrade serial in the correct serial (license) screen in the Melody Sauce 2 plugin. To get to this screen, press the upgrade button on the first screen you come to when opening Melody Sauce 2. You should see space for 2 serials (license keys) to be added.
2. Make sure you copy and paste your original Melody Sauce version 1 serial (license key) in the first white section.
- For Mac 1. Use Command-C to copy serial (license key) number 2. Click your cursor inside the serial box first 3. Then use Command-V to paste serial (license key)
- For Windows 1. Use Control-C to copy serial (license key) number 2. Click your cursor inside the serial box first 3. Then use Control-V to paste serial (license key)
Note: Make sure there are no spaces at the start when you paste. Pay attention to the serial (license key) format xxxx-xxxx-xxxx-xxxx-xxxx. If any of the 5 sections of characters is only 3 characters long then you have accidentally added a space at the start.
4. Once you successfully paste your original Melody Sauce version 1 serial (license key) the second space for a serial (license key) becomes available. Copy and paste your Melody Sauce 2 upgrade serial (license key) in the space and click the blue upgrade button.
If the activation isn't successful, please make sure you followed the first 4 steps accurately and then move on to the next steps below.
5. Make sure you have a stable internet connection during the activation process.
6. Delete the "license_file" and "serial_file" files from the following location:
For OS X: /Users/<username>/Library/Keyzy/
For Windows: HKEY_CURRENT_USER\\Software\\Keyzy\\
Here is some info on how to access the Registry Files in Windows.
When you go to the "Software" folder in the registry, you should be able to see a "Keyzy" sub-folder, and in there are the 2 files to delete.
Once you have deleted the files, load the plugin and go through the upgrade process again.
7. If you have accessed your registry and there is no license-file or no Keyzy folder at all, this confirms that you have a firewall setting that is preventing Melody Sauce 2 from writing the necessary files to your computer. Turn any firewalls off during the activation process and also note that some VPNs can cause issues too.
For Windows users, here is some info on how to configure Windows Defender to allow programs like Melody Sauce 2 to be installed properly.
You can find this in the email you received from Sealbucket (older customers might have received their email from Keyzy.io) when you first purchased Melody Sauce 1, or by logging into your account page.
Make sure to follow the first 3 steps below. If you still have an invalid serial error, then move on to the subsequent steps.
1. Make sure you enter your full Melody Sauce 2 serial (license key)l in the correct serial screen in the Melody Sauce 2 plugin - it is the first screen you come to when opening the plugin for the first time.
2. Copy and paste to enter your serial (license key).
- For Mac 1. Use Command-C to copy serial number 2. Click your cursor inside the serial box first 3. Then use Command-V to paste serial (license key)
- For Windows 1. Use Control-C to copy serial number 2. Click your cursor inside the serial box first 3. Then use Control-V to paste serial (license key)
Note: Make sure there are no spaces at the start when you paste. Pay attention to the serial format xxxx-xxxx-xxxx-xxxx-xxxx. If any of the 5 sections of characters is only 3 characters long then you have accidentally added a space at the start.
3. Make sure you have a stable internet connection during the activation process.
4. Delete the "license_file" and "serial_file" files from the following location:
For OS X: /Users/<username>/Library/Keyzy/
For Windows: HKEY_CURRENT_USER\\Software\\Keyzy\\
Here is some info on how to access the Registry Files in Windows.
When you go to the "Software" folder in the registry, you should be able to see a "Keyzy" sub-folder, and in there are the 2 files to delete.
Once you have deleted the files, load the plugin and copy and paste your serial (license key) again.
5. If you have accessed your registry and there is no license-file or no Keyzy folder at all, this confirms that you have a firewall setting that is preventing Melody Sauce 2 from writing the necessary files to your computer. Turn any firewalls off during the activation process and also note that some VPNs can cause issues too.
For Windows users, here is some info on how to configure Windows Defender to allow programs like Melody Sauce 2 to be installed properly.
The serial (license key) is sent to you by email from Sealbucket. You may need to check your junk folder.
If you haven't received your serial please open a support ticket and we'll send you it.
You can also view your serial in your Evabeat account if you have purchased from our site.
Stay up to date with all things Evabeat with our mailing list
